|
Not really much to show for the 19th, but I did manage to get the header above the door in place. To do that, I got a spade and prized apart the two 2x8 boards which had been nailed together, and lifted them into place. It soon became clear why they hadn't been able to fit into the gap - they were too big, by about 5mm. Nailing the rest of the wall together must have tightened up the space available. So I took the ends off with the mitre saw, lifted the boards up individually, and screwed them securely into place, and to each other. The rest of the day was spent putting the front wall of the front section together, ie the main entrance to the shed. This was very fiddly because every piece had to be nailed together in the correct order, so I took my time doing it. By the time Bad Girls came on(!) I realised I wasn't going to finish, so left it until the morning of the 20th. Next morning it was all finished off in no time at all, and the whole wall was propped up against the back section so that I could build one of the side walls. These are very simple (no windows or doors) so it was a piece of cake. With that attached, the front wall could also be attached with the help of my glamorous assistant Sarah, who I told to stand in the doorway while holding it so that it couldn't possibly fall on her - she was still worried after the bash on the head the other day! Just one wall to go, which I could have done had I not been short of 2 lengths of wood, and the shed walls will all be finished! Plus the header over the wall again, but I know how to do that safely now! The pictures speak for themselves - I'm really pleased at how good it's looking. This is the first thing I've ever built, I have no carpentry experience whatsoever, so if I can do it so could you!
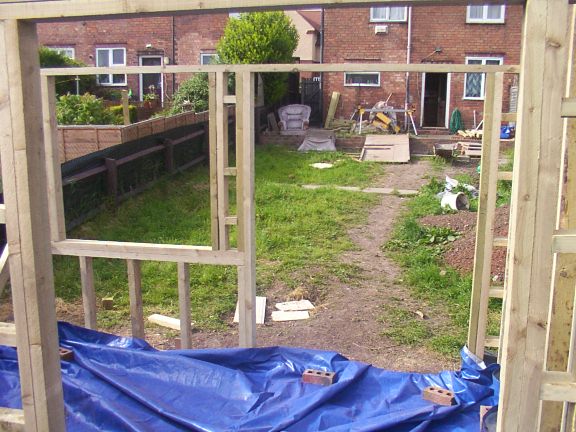
A better view of how the front wall is constructed, but the garden leaves a lot to be desired! Look at the other pictures and you'll see that around the doors and windows there are lots of horizontal pieces of wood called 'noggins', which are used to strengthen the structure. Without them the vertical pieces might eventually go bendy (er, is that the correct technical term?!) and tend to twist or move where they shouldn't. Although I could have added many more noggins on all the walls before lifting them into place, I decided to do them last, for several reasons: I can use all the spare wood offcuts that are left, I can get the whole structure up quickly (it only took a week!), and I can straighten the walls out if they are slightly out of true - the noggins will make the whole thing much more solid so doing them last will make sure that everything is square and vertical.Here's a dictionary definition for you: Nogging pieces = horizontal timbers placed between the vertical studs of a stud partition to stiffen them.
|
|
Back Next
|
|
