A tiring but satisfying day spent building something which will eventually be completely dismantled! Here's something I wrote on the Readersheds forum which explains what happened today:
The shed roof is all trimmed and nice except for a few bits I can't reach, so the next stage is to get climbing about on top of it and get it felted/shingled and finished off. Here's my problem: ain't no way I am going up there with a roof hook/ladder and nothing below it if (or more likely WHEN I fall off). Even if I didn't fall off I would be bricking it 100% of the time and I probably wouldn't do a good job.What I need is some kind of scaffolding, but what I don't want is to rent some of the pipe stuff cos you know me by now, I do it when I feel like it and it will end up costing the earth. I have a lot of wood waiting to be used - for the ceiling joists - so I thought to myself can I build some wooden scaffolding? So long as I didn't cut too much of the wood, I could just dismantle it afterwards and re-use it - the screw/bolt holes would just add to the character!
And after some sketchy plans and lots of people insisting I should buy or rent metal scaffolding, I ignored all advice from the sceptics and (with a lot of help from my glamourous assistant Sarah!) did this...PS Safe? Course it's safe! I'm still alive aren't I?!
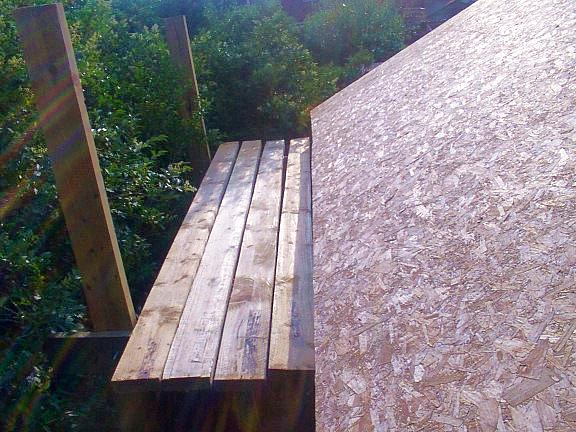
And this is what it really looks like, viewed from up the ladder at the other end of the shed. Still to do: the back needs fencing off, which I'll do with long boards, just like the ones on the platform. They can be screwed on rather than bolted I think. There's plenty of height in that barrier for me to feel safe I reckon. Hmm, rails at the side like the back? How do I fit a vertical piece of wood so I can attach the horizontal bits? I'm having a think about that and will sleep on it.I've slept on it (had a can of cider, next best thing) and decided that I can attach rails at 90° to the back rails (if I make sure they hang over far enough) and attach the other end to the gable end of the shed. Simple! Notice the floor boards are close together at the bottom of the pic, wider apart at the top. This is because the scaffolding is narrower at the bottom, where the trellis behind it was apparently not quite parallel. I think this is the beauty of a DIY system - I was able to cut it all to size (only the 2 horizontal pieces were shorter) and adapt it to my needs. Spacing the boards like that was Sarah's idea - clever girl, I had them all bunched up with a huge gap at one side until she worked that one out. I must be getting tired and old! I also need to screw the boards more firmly to the ends, so they don't all slide out of place, and one of the boards is more wonky than Willy Wonka doing a slalom so that needs swapping!
|
|
Back Next
|
|
